Basic Triggers #6 Video Summary

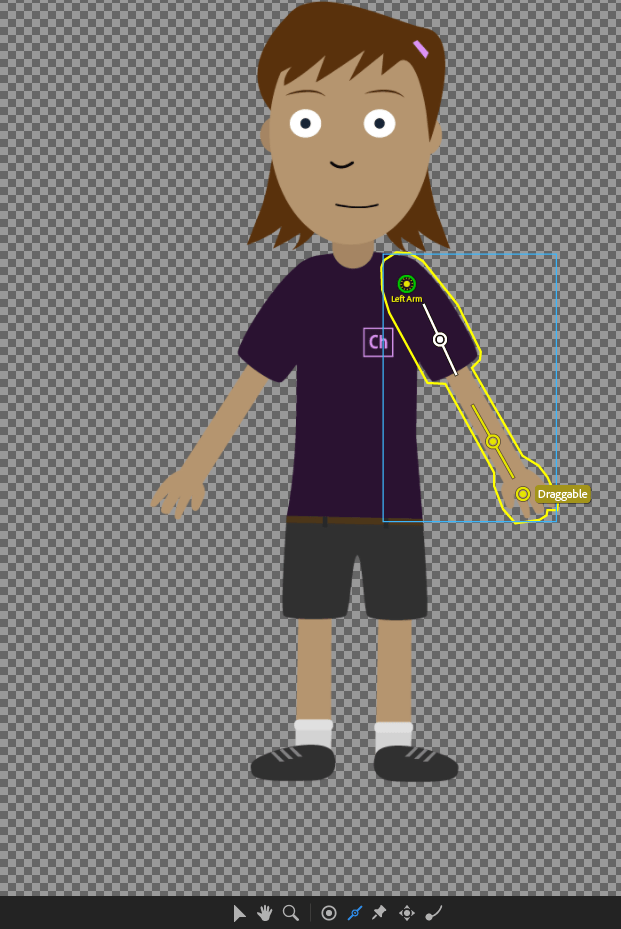
Basic Triggers are stimulated through numbers on your keyboard. For example, press 4,5, or 6 to swap the hand. I learned that you can also customize the keys to activate the trigger. You have to click and drag and move it to the triggers panel. I learned that you could also create swap sets meaning  you’re able to create whole groups in the triggers panel. But you have to mark “Latch” so it doesn’t count as default.

I learned that groups can also have a behavior associated with it. There are pause layers which uses frame by frame animation, there is the fading affect, and the physics in motion, etc.

To edit the animation there are layers of the animation you’re able to edit from, There is a cycle panel associated with it that you can edit as well. There is also a behaviors panel you can edit that has to do with physics. Cycle pause means little by little and the animation doesn’t play all at once.

Character Animator #5 Characterizer Summary

First you have to choose one picture or you can use manual capture to get your image. It’s best to get a manual capture because that way tit’ll get a note of all of the different types of features and faces that you made. It’s more helpful if you’re being more deliberate when you pronounce these words that way you’re able to get a better face expression of that letter/word.

Then you will be put into capture. And this is where you spend the most time because that way you’re able to edit. You can pick any style you want. You can edit the amount of stylization, feature exaggeration, and etc. Then once you”re happy with it you can click Generate Puppet – export frame

Then you will be able to edit how much you’re features move when you talk, by adjusting the eyebrow strength, eyelid strength, etc. To get into more detail you can open it up in rig mode to see how the sticks and such are attached.


Character Animator #3 Video Summary

To Create an Animated Live stream instead of working in “Record” you must switch over to “Stream.’ This hides the timeline and gives you fast and convenient controls. You have to create some controls ahead of time to use to trigger various animations.

To make a control panel for you character’s movements you click, “Generate Controls for Bluster” You can customize the layers to your liking as well. There’s a group called “hidden stuff” to drag into one of your panels. You could also drag your “transform” scale properties to the control panel.

Diverse Emotions: You can mix up mouth and eye positions to fit the mood of the subject you’re talking about.

You could also add replays and cycles.

  • position arms where you want it
  • Record for a few seconds
  • Blend edges
  • Right click “Create trigger and replay”
  • Set it to Stop/Sustain replay
  • Made sure trigger is latches
  • and add a key “x” to it for a variety of poses

Character Animator Recording and Editing #2 Summary

In this lesson I learned how to record and edit,

You must click “set Rest Pose” first to locate the features of your face to sync with your character. To record you click the red button below the character, and then say something. You use your mouse to control your character’s arms/etc. Then when you’re done you click the red button to stop recording.

Then below you will see layers of your movements and audio. To make adjustments you can change the time duration of the clip you just recorded by focusing on one behavior at a time. You can record the single behavior and add it to your takes.

There can be very abrupt transitions so you can you drag the ends of the take to smooth out the transitions.

To activate triggers you play the clip and when it’s time you can click on the icons to activate the triggers.

Character Animator Video #1 Summary

For the first few lessons in this video I learned how to make my features on my blank face independent. In this case you want your eyebrows and pupil to be independent so when you move it, it doesn’t actually wrap your characters whole face. You can edit your character in Photoshop and add anything you’d like.

In the last couple lessons in this video I learned about the movement of the body. To make the arm move normally I learned where to locate draggers, pins, and lines/sticks. I also learned how to ground my character. You also must not make your head/face independent because it will move on it’s own instead of with the body itself.

564

Body Motion

nhnujh

Photoshop to edit

Replays Adobe Character Animator #9 Tutorial Summary

Capture
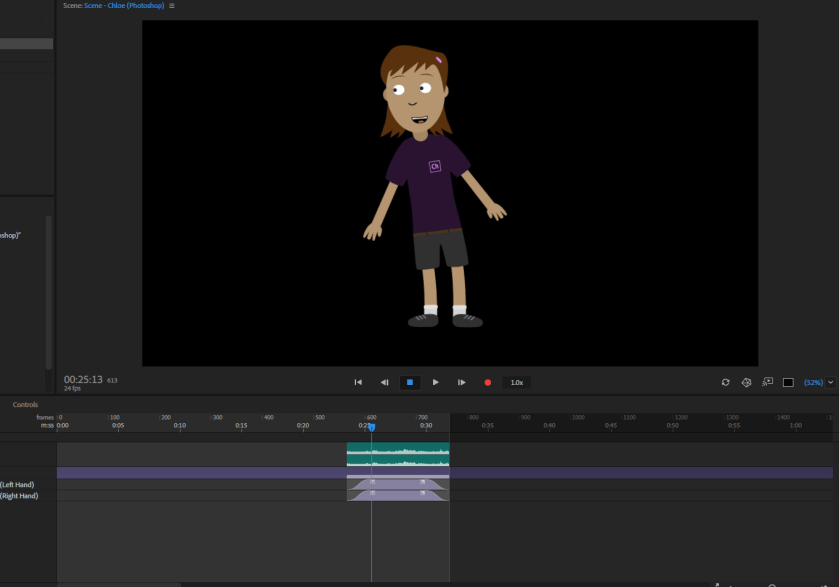
In this tutorial video I learned how to make “replays”

First, they showed you how to make the elbows of the arms move more naturally so that when you move them, they don’t look double jointed. In order to do that, there were points that you had to move to the elbow the wrist and the upper part of the arm. Then you can set the arms where you’d like using your mouse then you press the red record button.

I also learned how to make a short replay of the character waving and dancing. To not make the replay choppy and make it run smoothly I decreased the beginning and the end of the snippet to make the actions more slowly towards the beginning and end to make it flow smoother. Then to save as a trigger replay you select everything and left click and click create replay and trigger and then you have that short replay saved.

Lesson 2

L2start_1.jpg

For the tree and fence I learned to used the align to art board/key/selection and aligned my fence. I also learned about the grouping option to bring over to another lay/art board.

L2start_2

For the school bus I used the align option to align the horizontal lines on the front of the bus. I had to use the white arrow selection to move the anchor point for the top of the bus. I also learned to hold down the shift button to drag and copy items.

Lesson 1 Overview Summary:

In this lesson I learned to become more familiar with my workspace and know where to locate the panels, controls panels, status bars, the tools panel, etc by going into depth with what each tool does.

I also learned how to change the interface brightness and how to navigate my art boards. The most significant step of this lesson is saving your work and making sure to reset your essentials.

The navigator tool made sure there was a view of all of the art boards by allowing them to fit abroad on your screen.